OMG... Oh My Granite is something we have be waiting for since we purchased three sisters (Yellow River Brushed) and an orphan (Blue Bahia) a year ago on 9/20/2012.
This is a huge milestone to get these stone tops installed on our cabinets. We have been working up to this moment like the oak flooring.
ABOVE, Craig looks at the cutout for gas cook top as he wonders what the new granite looks like and how well will it blend with the rest of the Kitchen finishes.
LEFT, Darrell scan his new smart phone looking for lost messages and scheduling subs for post granite tasks.
BELOW, the Granite wagon arrives with all our stones ready to be installed.
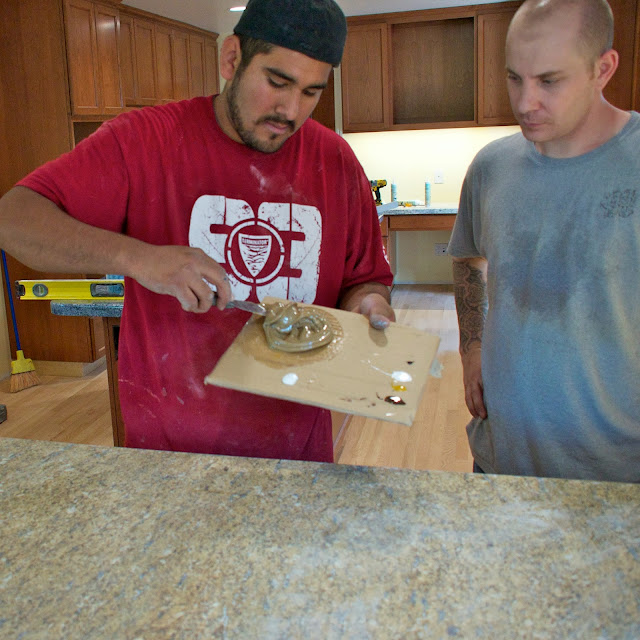
This day is dedicated to the seasoned installer, George, the red shirt and Eric, the gray shirt, trusted assistant. Together they lugged heavy stone slabs, fixed edges, tilled them to cut rough board, glued them, sealed them, caulked them, drilled holes for fixtures and cut hole for sinks and appliances.
RIGHT, George prepared stone to hide any trace of a cut line on the granite. Further down the blog see the color kit.
LEFT, Craig checks out the new deep utility sinks. Sandy lobbied for the largest deep sink she could fit in that cabinets.
I am testing the drain hole to insure good flow. You can almost give a Maine Coon cat a bath; watch out, Will and Grace.
The crown jewel of the stones to be install is the Blue Bahia topping our island counter. We guessed it weighs in excess of 400 pounds. George leads the helpers as they head the slab to the front door.
Buba assist his team to position the slab as it will rest in it's new home.
It is important that the sink hole aligns properly on the island counter top cut out.
George and Buba check the critical dimensions to insure the slab is sitting just where it suppose to.
Buba and Eric slides the slab till every element is in perfect alignment. Now, George can apply the silcone adhesive on the rough board and drop the slab back into position on the island counter.
The Steeles have that rare situation they are both taking photos at the same time on this key remodel phase. Sandy is using a flash to capture her construction candid poses. Craig is shooting with available to document his phase of this construction.
By the end of day we shot over 500 action images.
Darrell and Buba discuss a critical detail concerning using the stone to create a backslash shelf combo. Part of the conversation is discussing the stone mini counter on the other side of the Kitchen window. George is checking how level the stone is as it sits on the new cabinets.
RIGHT, the building colleagues agree to what are next steps; then laugh at some past installations or just joke about their current clients, Craig and Sandy.
I am sure their work has never been so documented like this remodel.
RIGHT, Eric and George prepare the rough boards by rounding the edge before slipping the stone slab into position.
Fabrication involves so much of small handheld power tools. You are cutting, drilling, vacuuming, trimming, etc. for each phase of the installation process.
The following are some of the tools of the trade to get the results you come to expect from craftsmen dedicated to client satisfaction.
LEFT is diamond blade cutting saw
used to make the cutout for the gas cook top. Note the vacuum nozzles catching the fine cutting dust
The surrounding three photos show how George achieves the correct color match as he fills the seams between slab to mask their are separate stones. It is quite an art requirement mixing a base color and troweling into the seam and when satisfied with the color add the hardener to the initial resin for the permanent sealer.
BELOW, Can you see a seam?
RIGHT is the gluing the 'L' shaped slab into place. After this piece was glued the sister slab was butted up and aligned into position.
ABOVE, the final check to make sure the new fixture fit.
We had one problem needing to be fixed. Darrell discovered in unpacking the fascets for the bathrooms that they would be hit by the door swing of the mirror... Ops. So Stacy had to rise the medicine cabinets 3-1/2" to clear the door swing.
BELOW, is a partial view of the Blue Bahia in the Hall Bathroom.
ABOVE, are two key products to keep our stone looking good over the years.
BELOW, what the counter now looks like at Five AM.
Check out the first picture in this blog to see the difference, OMG!
NEXT: I will be off on a road trip for three days so look for the next blog
on Thursday PM or Friday AM.


No comments:
Post a Comment